

Let's start the project with what you will need...
1 yard of cotton fabric (make sure to wash it!)
1/2 yard of contrasting fabric if desired-- it will be used to make bias tape (wash it as well!)
thread, needle, sewing machine and cissors,
and finally, a hook set to close the shirt when done!
Ready? Ok, let's get started!
To figure out a pattern that would fit my little Marla, I took one of her shirts I bought at Target.
I traced around it to figure out the peices I needed. I added a little extra room because the teeshirt has some stretch and the fabric I picked out, does not!


Front and back of shirt. Cut one of each on fold.

For the sleeve I drew it tall enough to add a little "poof." Cut 2 on fold, for 2 sleeves! ; )


For the inside of the shirt, I drew these facing peices. i drew them right off the front and back peices I got off the tee shirt!


Note that on the back peice, you will have to cut an opening for the head to go through (and also where we will open/close the shirt once done) That slit is placed at the top of the back of the shirt, on the fold. Make sure to add that same slit to the back facing peice!


Ta-Dah! all your peices are ready to get started!


First, let's sew the facing peices together at the shoulders then serge or zig-zag stitch the lose threads. Once put together, this will serve us as a pattern to draw out the collar for the shirt in the next step.

Align the peices at the shoulder, sew.

Press the seams flat with the iron.

To draw out the collar for the shirt, I laid the facing peice onto a white sheet and paper.

and with a sharpie, it's time to draft the collar out!

I cut my peice in half and used it as my template to cut the fabric.

Time to cut! Cut 4 peices.

Before going any further, grab your contrast fabric and create your bias tape with your iron.
I usually cut a 2" wide fabric in the length of the peice I purchased (about 44") With the iron, I fold that peice in half in the length. Open it up and fold the raw edges inside to meet at the middle line you ironed just previously! This is what you should end up with:

And let's start on the collar. This is the result we are aiming at:

Take 2 peices of collar. Place them right side against right side.

Pin the bias tape in between the 2 peices of the collar, on the side of the collar that will be exposed. Make sure to place the open side of the bias tape towards to outside like so:

Pin in place.


Sew in place.


Turn the collar inside out and press with iron.

Next step, place the front and back peices of the shirt right sides against each other. Pin the shoulder together:

Sew together. Fild outside out and press on the seams of the shoulders.

Next, lay your shirt out open like so:

Add the collar on top like so:

Add the facing peice as your 3rd layer and pin in place like so: (make sure the slit in the back for the opening is the same on the shirt peice AND the facing peice)

Sew together. Flip back to the front. Keep the collar to front of shirt and press the facing in the inside of shirt.

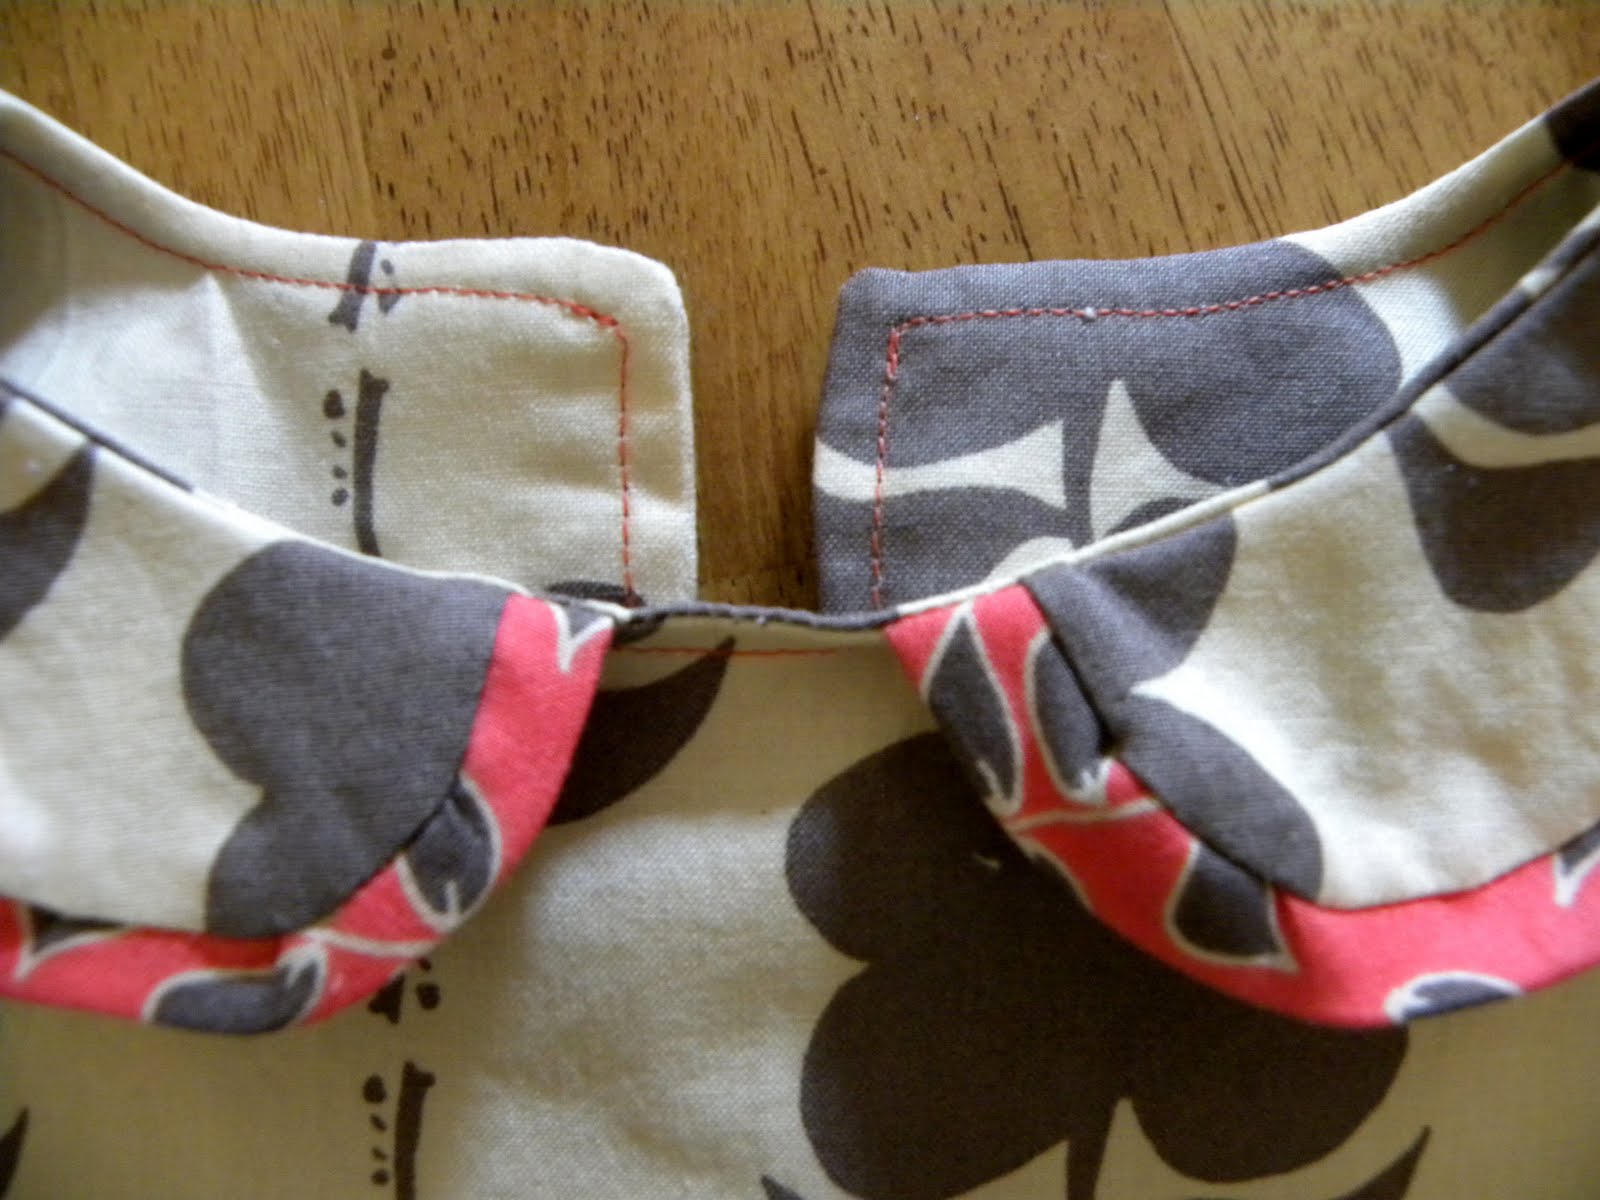
To keep the collar and the facing in place, stitch under the collar at 1/4" around the entire border like so:

Ta-Dah!

Off to the sleeves. Take your bias tape and let's place it onto the edge of the sleeves. This will give it a clean and polished look!

Place the bias tape so that the sleeve's outer edge will be sandwiched in the bias tape like so:


Sew close to the edge of the bias tape. Repeat for the second sleeve.

Next, we need to "poof" the sleeves. For this step, I set my sewing machine at the longest stitch and titghtest setting. This will allow you to pull the thread so that you can roush the sleeve. I started stitching in the curve of the sleeve, up to the top and most pointy part and back down to the next curve of the stitch.


Pin the roushed edge to the arm hole of the shirt.


Serge or zig-zag stitch to hold the little lose threads in place.

Almost done!!!

Now, we are going to work on the raw edges at the bottom of the shirt. Take your bias tape and place it to the front and another peice of bias tape to the back. Sew in place.

Flip the shirt back inside out and pin the edges on both sides of the shirt together, all the way to the sleeves.

Sew in place. Then, zig-zag stitch or serge your edges.


Next step, I placed my Raspberry & Chocolate tag!

Place a hook at the top of the opening of your shirt:

TA-DAH!!!!!
Pat yourself on the back, you are done!!!! It's time to admire your work and enjoy!!!!


Happy sewing everyone!!!!
Hey Celine. This is adorable. I'm not sewing much these days...but I love this cute shirt! :)
ReplyDelete