hello everyone!
It had been a while since I blogged about some home-sewn goodies! As of July 14th, I am the mom of a little boy, Jean-Maxime! His big sister Marla has been really excited about this little guy! He is such a chunk! I just want to pinch him all the time!!!
So to celebrate my coming back to the blogging world, I thought I should share a baby project, and in this case, baby-BOY project!


I went to the thrift store and got a pillow case, and a plain white cotton tee, all for $2.24! And this is what I decided to make with my great findings... Upcycled Burped Cloths!
to complete this project, you'll need:
- a white tee (in my case, I chose a fairly thick tee with some stretch in it--it's much softer!)
- fabric of your choice! (in my case, the pillow case!)
1- Wash your fabrics, dry and press.
For the pillow case, I removed as much stitches as I could to get the most out of my peice.
I got 3 out of my tee. It was a size Small and there was a pretty large yellow stain at the bottom of the tee that even a good machine wash didn't remove! So I cut 3 rectangles from the tee and layed them out on my pillow case fabric so I could cut 3 matching peices!


3- Create an applique... if you want! It's a good way to add a little pezzaz to your burp clothes and to personalize them to your taste!
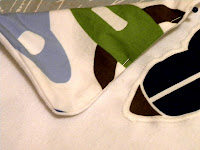
In my case, I cut out 3 different "space shuttles!" Pin your applique to the white tee peice and sew with a tight zigzag stich. When you are done, press with a hot steamy iron!
4- Sew burp cloth. Pin right sides together. Leave an opening to turn it inside out.
I made rounded angles to make it pretty! Don't forget to trim your edges and clip the corners before turning inside out. Once you did so, press with your iron. Pin the opening together.
5- Sew the edges on the right side of the burp cloth. Set your needle to at 1/4" away from the edge and stitch around the entire peice so that the opening hole is sewn shut as well.
6- Ta-Dah!!! you are done! ; )
I made 3 that I am going to keep for the diaper bag I carry around! Max is a bit of a spitter, so I needed these to be handy, not too big and to fit everywhere he and I go! You can make them any size you want and for WHOEVER you want!! I know I will be making some more as a gift set here and there!!!
Have fun sewing!


Good Job. I'm a lovin it! :)
ReplyDelete